Step-by-Step Guide: How to Create IAM Roles in AWS

Are you fascinated by the boundless possibilities of cloud engineering? Are you eager to dive into the world of scalable infrastructure, automation, and cloud-native applications? Look no further! I invite you to explore my collection of technical blogs on cloud engineering, where I share insights, best practices, and practical knowledge to help you navigate the cloud landscape. Embark on a journey of discovery and elevate your cloud engineering skills to new heights!
I'm a Cloud Engineer, Content Creator, and Community Engineer who is currently learning to become world-class. I'm passionate about sharing knowledge, documentation, and others.
linktr.ee/faveboladale
Introduction:
IAM (Identity and Access Management) roles play a crucial role in managing permissions and access control in AWS (Amazon Web Services). In this step-by-step guide, I will walk you through the process of creating IAM roles in AWS, allowing you to grant specific permissions to users, groups, or AWS resources. Let's get started!
Step 1: Navigate to the IAM Service on AWS Management Console
Once logged in, search for "IAM" in the services search bar at the top of the AWS Management Console. Click on "IAM" from the suggestions or select it from the list of available services.
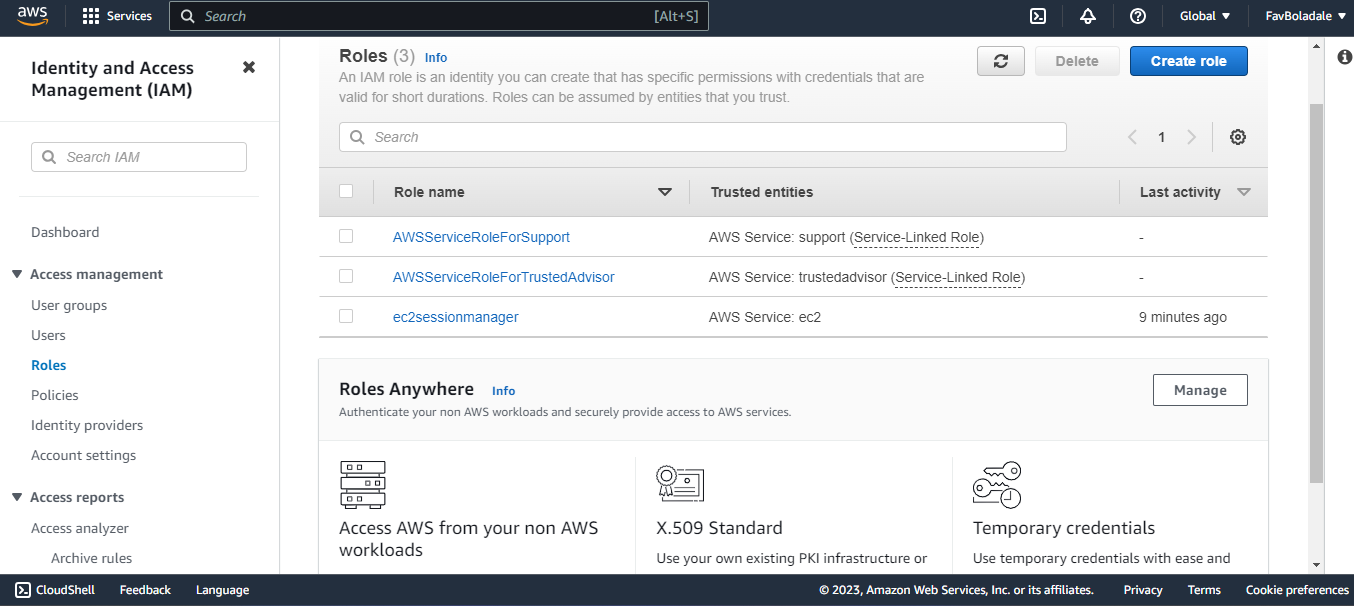
Step 2: Access the IAM Roles Section
In the IAM console, you will find the left-hand navigation pane. Click on "Roles" to proceed, then click on the "Create role" button.
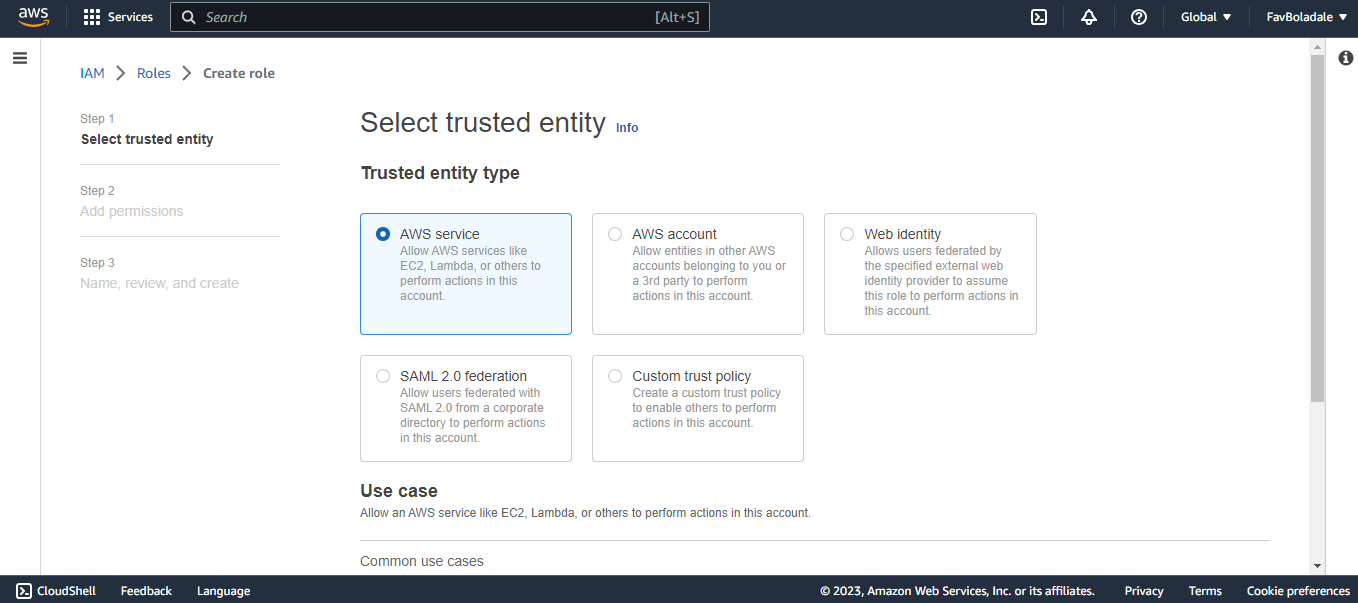
Step 3: Select the Trusted Entity and the Use Case
On the "Select type of trusted entity" page, you have various options:
a. AWS service: If you want to grant permissions to an AWS service.
b. Another AWS account: If you want to grant access to another AWS account.
c. Web identity: If you want to grant access to web identity providers like Amazon Cognito, Google, or Facebook.
d. SAML 2.0 federation: If you want to grant access to users from your corporate directory that supports SAML 2.0.
In the Use Case section, choose the appropriate option based on your requirements and click on the "Next: Permissions" button.
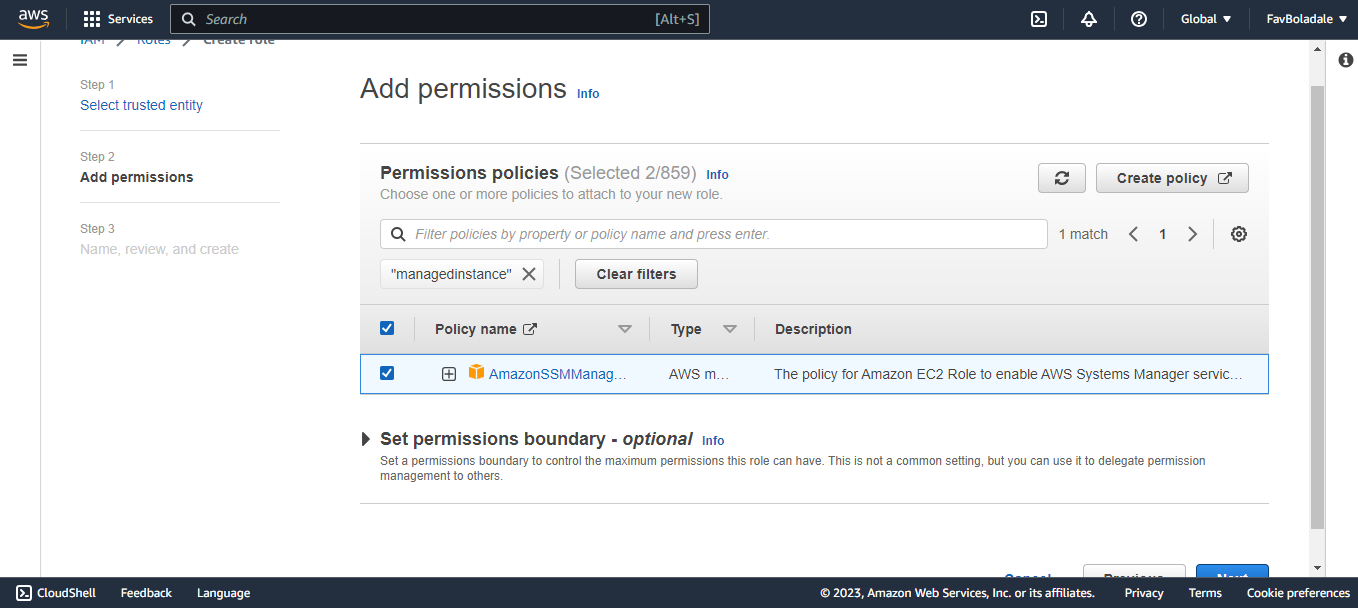
Step 4: Attach Permissions Policies
On the "Attach permissions policies" page, you can attach one or more IAM policies to the role. You can choose from existing policies or create a custom policy based on your specific needs. To attach existing policies, search for the desired policy in the search bar and select it.
To create a custom policy, click on the "Create policy" button, and a new tab will open where you can define the policy. Once you have selected the desired policies, click on the "Next: Tags" button. Here I will be using “AmazonS3FullAccess” and AmazonSSManagedInstanceCore policies.
Step 5: Add Role Details and Tags (Optional)
Provide a descriptive role name and description of the role. On the "Add tags" page, you can add tags to the role for better organization and management of your resources. Tags are key-value pairs that help in identifying and categorizing resources. Click on the "Add tags" button and provide the tag key and value. Once you have added the tags, click on the "Next: Review" button.

Step 6: Review and Create the Role
On the "Review" page, review the role configuration and ensure that everything is correct. If you need to make any changes, you can go back to the previous steps and modify the settings accordingly.
Once you are satisfied with the configuration, click on the "Create role" button.
Step 7: Role Creation Confirmation
AWS will create the IAM role, and you will be redirected to the "Roles" page. Here, you can see the newly created role and other existing roles.

Conclusion:
Congratulations! You have successfully created an IAM role in AWS. IAM roles provide granular access control and are vital in securing your AWS resources. Remember to assign this role to users, groups, or AWS resources.
To learn more about best practices and strategies to secure your cloud resources, implement identity and access management (IAM) policies, set up network security controls, and comply with industry standards and regulations, check out other blog posts I have on AWS IAM.
AWS IAM: Strengthening Security and Access Control in the Cloud
How to Create an IAM User and Add MFA
How to Limit a User's Access Using the AWS IAM
Remember to subscribe to stay updated with the latest posts, and feel free to share your favorite blog posts with friends and family who crave engaging and enriching content. Happy reading!


